
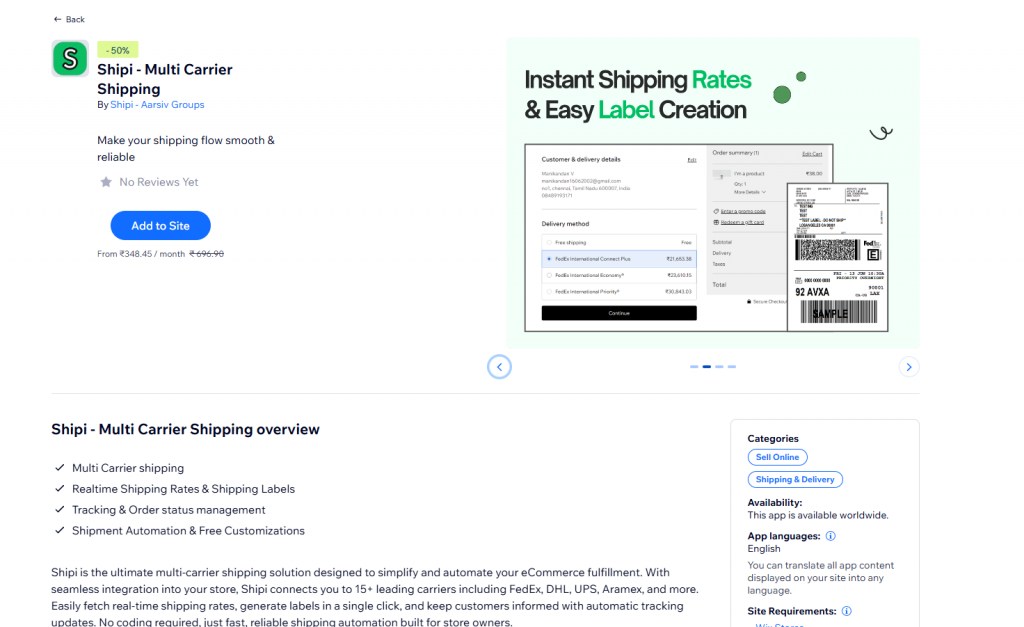
Installation & Setup Guide
🔧 1. Install the Shipi Plugin
- Go to Wix Dashboard > App Market .
- Search for
Shipi. - Click Get this app, then Install.
- You’ll see “Shipi – 10+Shipping Carriers” under your Apps menu.
🔐 2. Connect or Create a Shipi Account
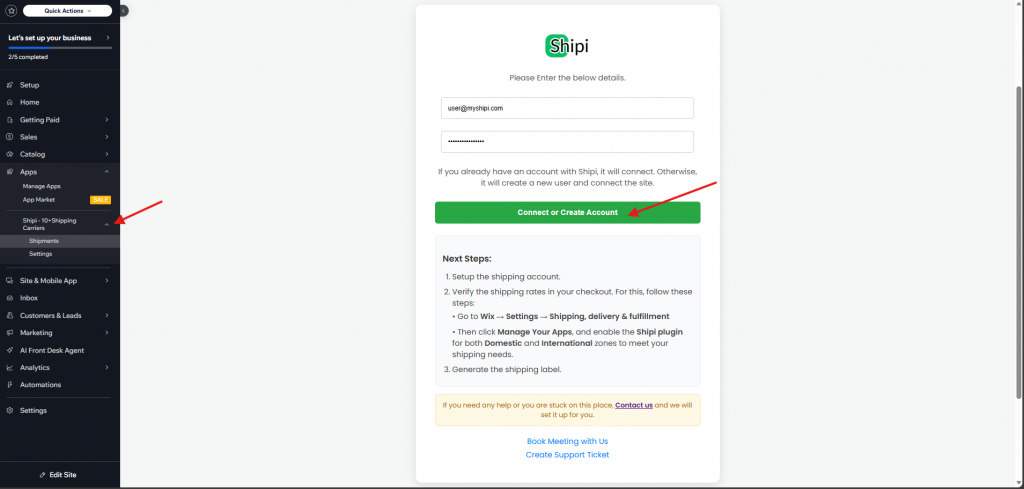
- Navigate to Apps > Shipi – 10+Shipping Carriers.
- A login screen appears.
- If you already have a Shipi account, enter credentials and click Connect or Create Account.
- If not, enter your details and a new account will be created automatically.
📦 3. Add Shipping Carrier Accounts
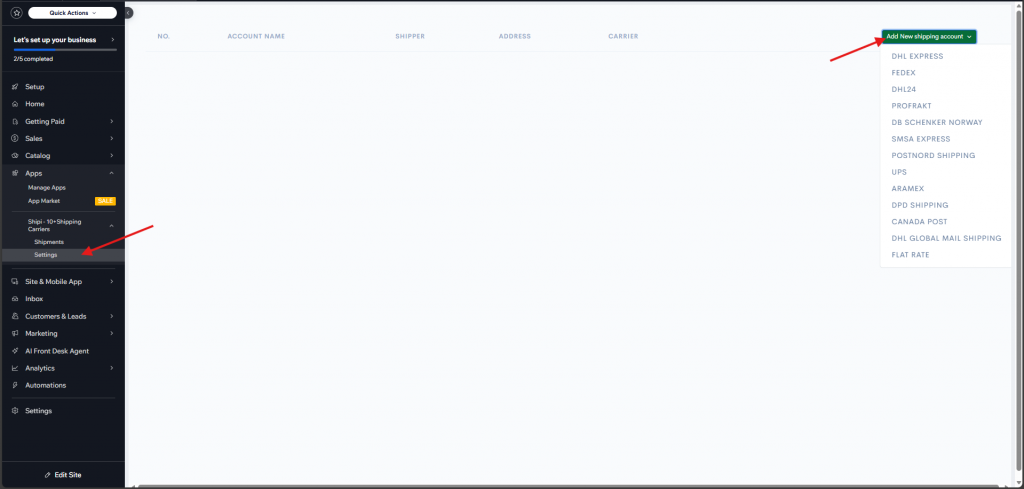
- After logging in, click Settings Menu and click Add New Shipping Account.
- Choose from 10+ carriers like FedEx, DHL, UPS, Aramex, etc.
- Enter the necessary API credentials and address information.
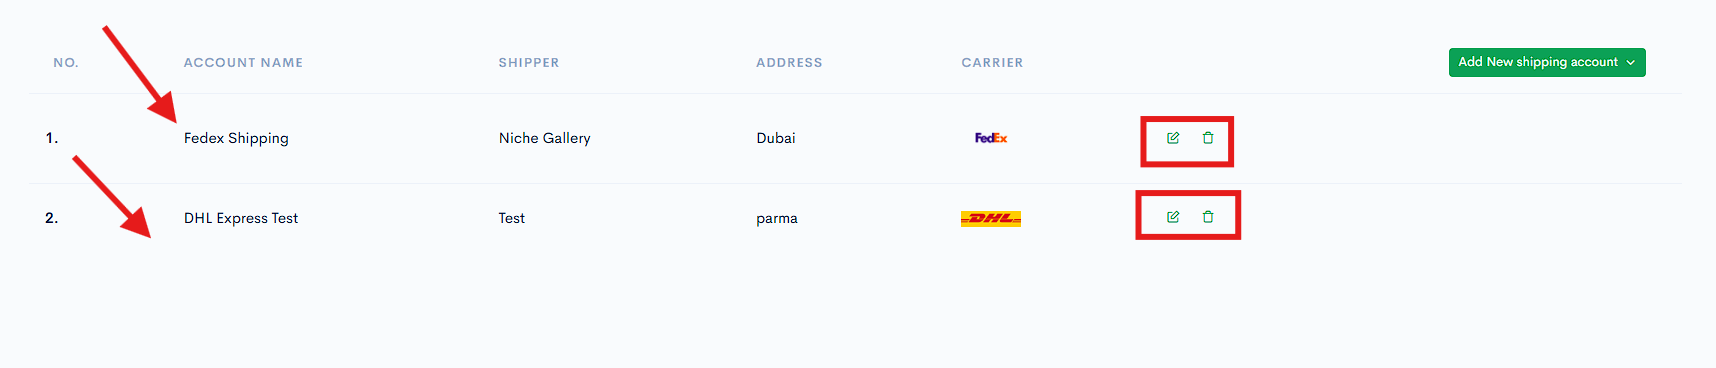
- Once added, the carriers will appear in your account list.
| Carrier | Configuration Link |
| DHL Expres | |
| FedEx |
🌍 4. Configure Shipi – 10+ Shipping Carriers in Shipping Zones and Add Shipi as a Shipping Method
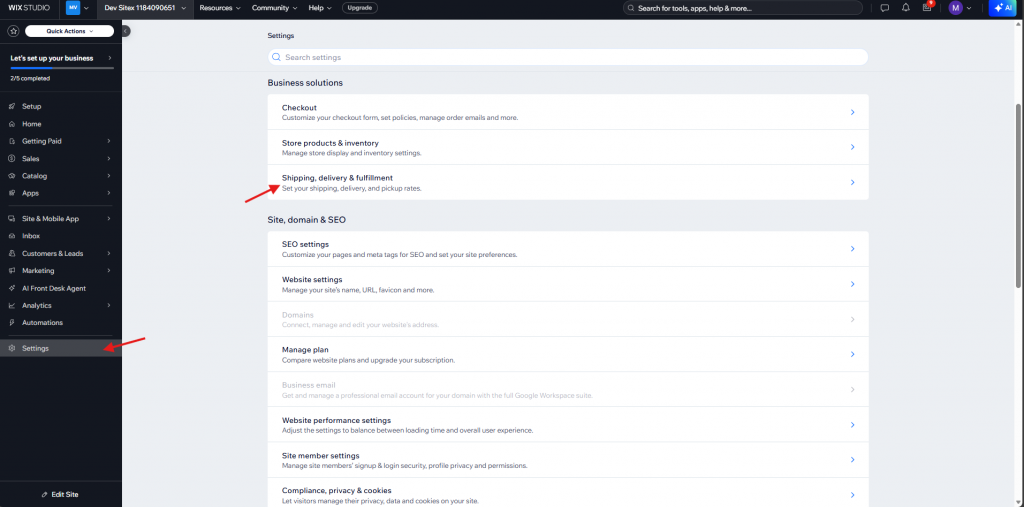
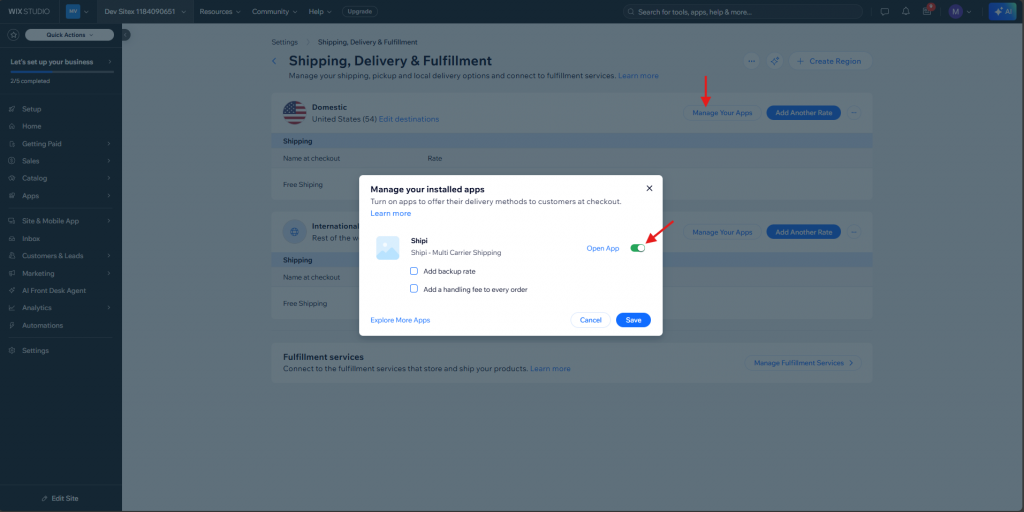
- Go to Wix > Settings > Shipping, Delivery & Fulfillment.
- Click Manage Your Apps in Domestic, International and enable Shipi app.
- Click Save Button.
🛒 5. After Successful Configuration, Real-Time Shipping Rates Display in the Cart
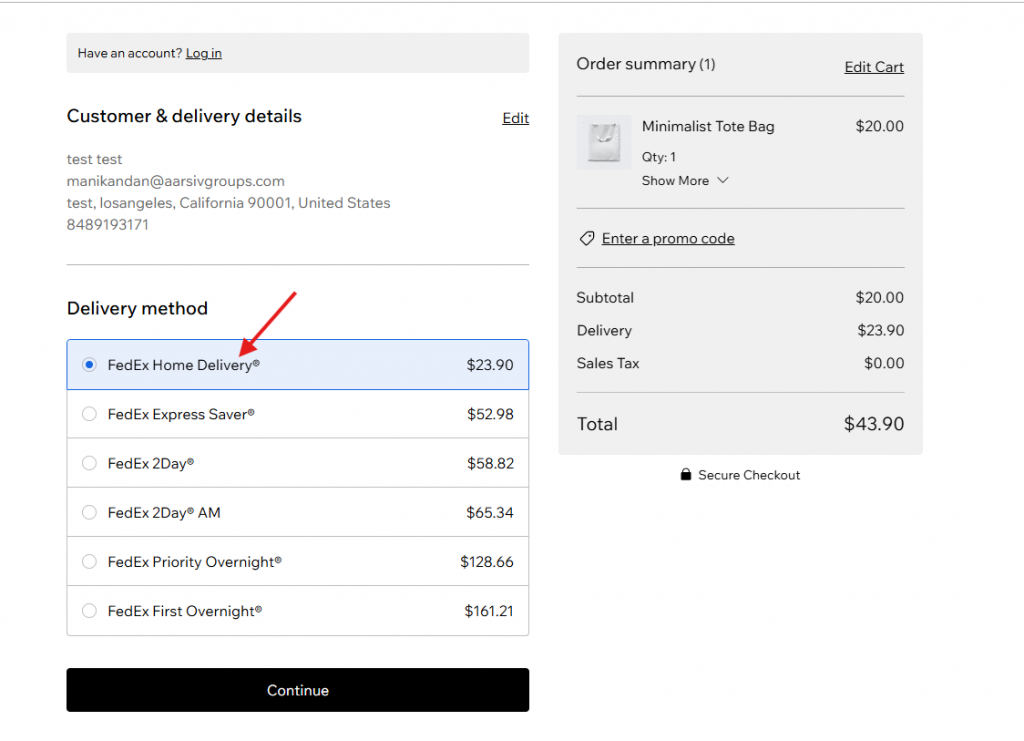
- Customers can now see shipping options like FedEx Home Delivery® during checkout.
- The shipping rates display here based on the configuration you did in the shipping account configuration page.
- Rates are shown based on Shipi configurations and product details.
📦 6. Generate Shipping Labels
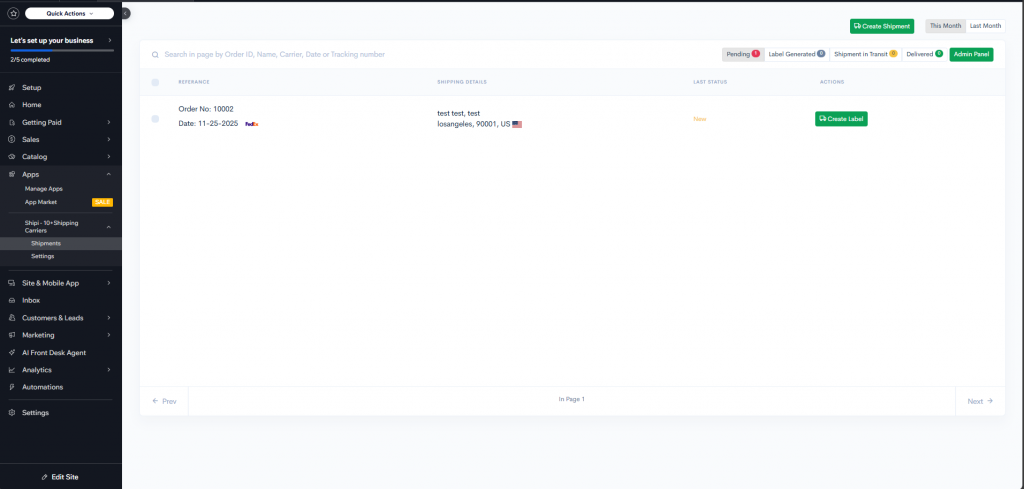
- Go to My apps > Shipi – 10+Shipping Carriers.
- If automatic label creation is turned off, the order will appear in the Pending section. If automatic label creation is turned on but an error occurs while generating the label, the order will also appear in the Pending section.
- Click Create Label button.
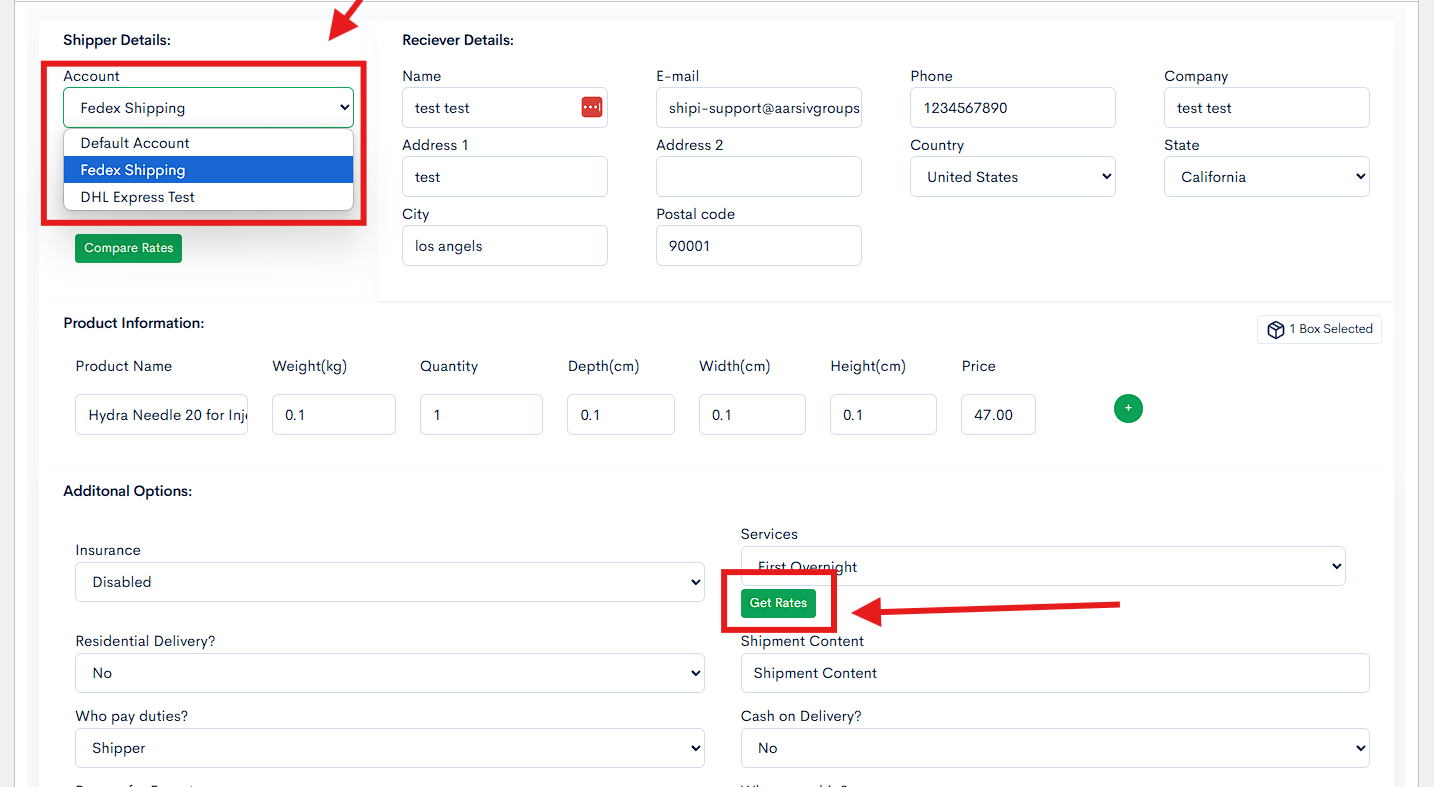
- Choose your shipping account and click Get Rates or Compare Rates.
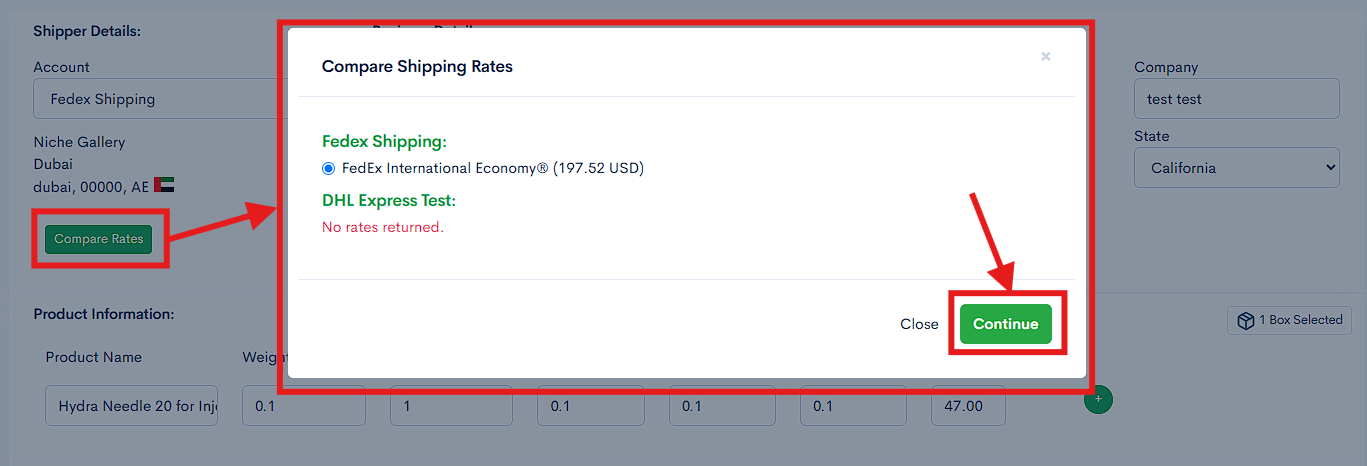
- Once the rate is selected, click Continue and click Create Shipping Label to generate the label.
🖨️ 7. Download Shipping Label, Invoice & Packing Slip
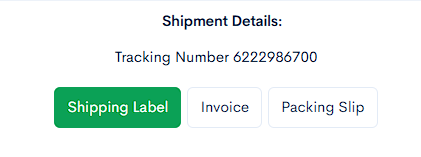
- After the label is generated, download:
- ✅ Shipping Label
- ✅ Invoice
- ✅ Packing Slip
These documents help in fulfilling and dispatching the order smoothly.
✅ Summary
With #Shipi, you can:
- Connect multiple carriers and different location.
- Generate real-time rates
- Print shipping labels instantly
- Handle multi-zone shipping
- Improve shipping efficiency for WooCommerce stores