
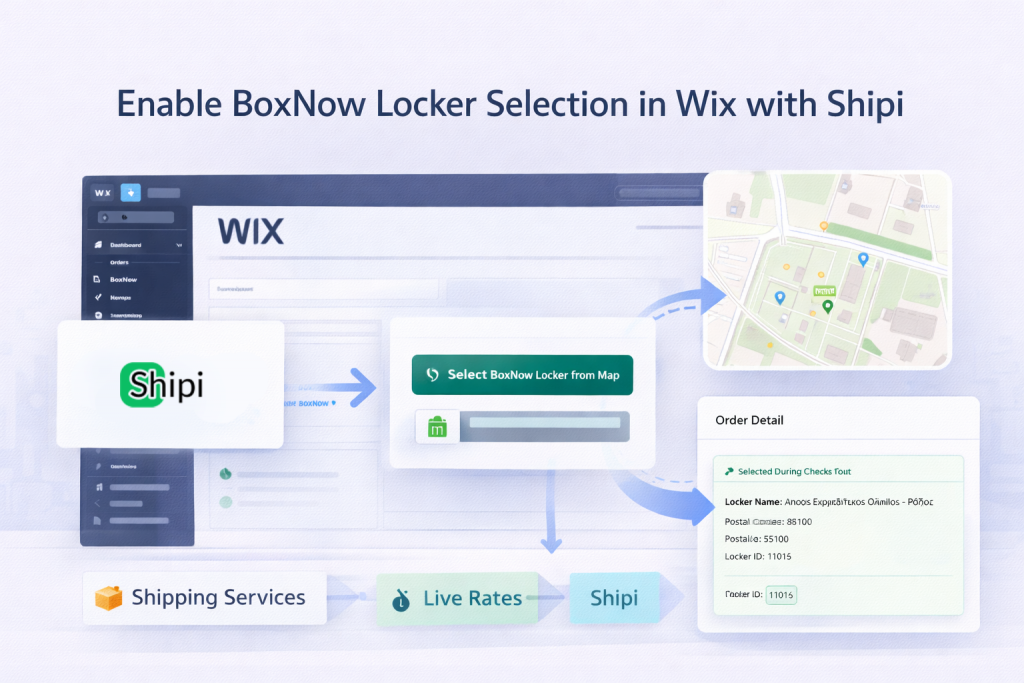
This guide explains how to enable BoxNow Locker Map selection in your Wix store using Shipi.
After completing this setup:
- Customers can select a BoxNow locker from a map at checkout.
- The selected locker address is automatically used for shipping.
- Shipi will generate labels using the chosen locker address.
- Locker details are visible inside Shipi order screen.
What This Feature Does
When enabled:
- Customer selects BoxNow shipping method
- A “Select BoxNow Locker from Map” button appears
- Customer chooses a locker
- Locker address + locker ID are saved
- Shipi uses that locker address when creating shipment
No manual copying required.
Step 1: Enable BoxNow Checkout Element in Wix
First, you must allow Shipi to inject the locker selector into your checkout.
Go to:
Wix Admin → Apps → Shipi → Lockers Map (BoxNow)
You will see this screen:
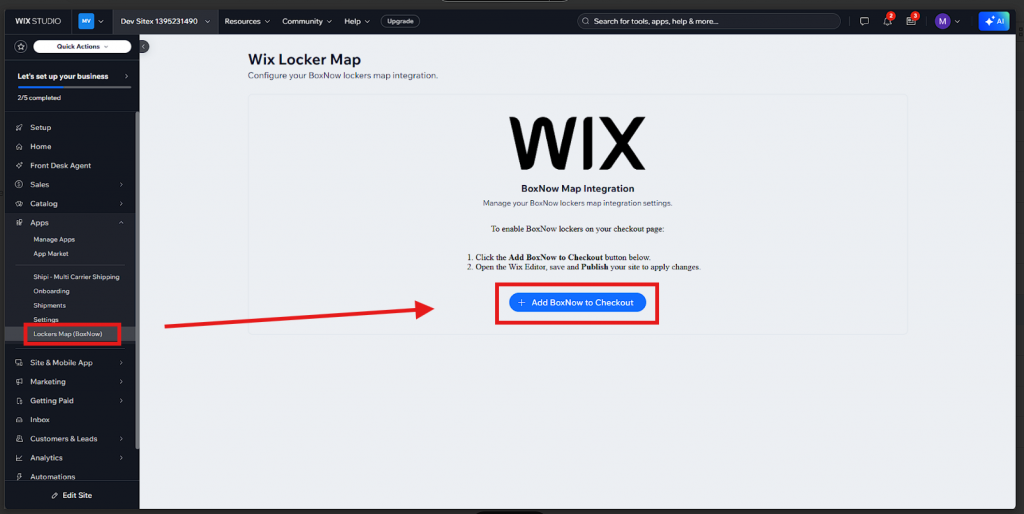
Click:
👉 Add BoxNow to Checkout
Then:
- Open Wix Editor
- Save your site
- Click Publish
⚠️ If you skip publishing, the locker button will NOT appear on checkout.
Step 2: Enable Locker Map in Shipi
Now go to Shipi dashboard.
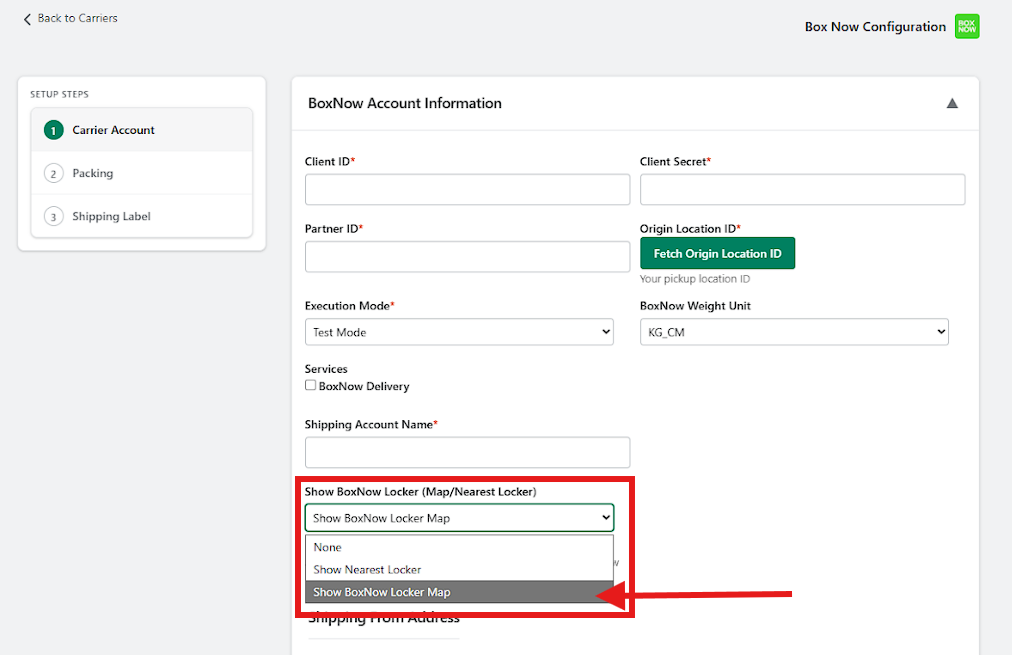
Navigate to:
Carriers → BoxNow → Shipping Account Configuration
Scroll to:
Show BoxNow Locker (Map/Nearest Locker)
You will see 3 options:
| Option | What It Does | When To Use |
|---|---|---|
| None | Disables locker selection | Use if you only want home delivery |
| Show Nearest Locker | Automatically selects nearest locker | Use for fully automated flows |
| Show BoxNow Locker Map | Shows map so customer can choose | ✅ Recommended |
👉 Select: Show BoxNow Locker Map
Save settings.
1. What Customer Sees on Checkout
Once enabled, customers will see:
🟢 Select BoxNow Locker
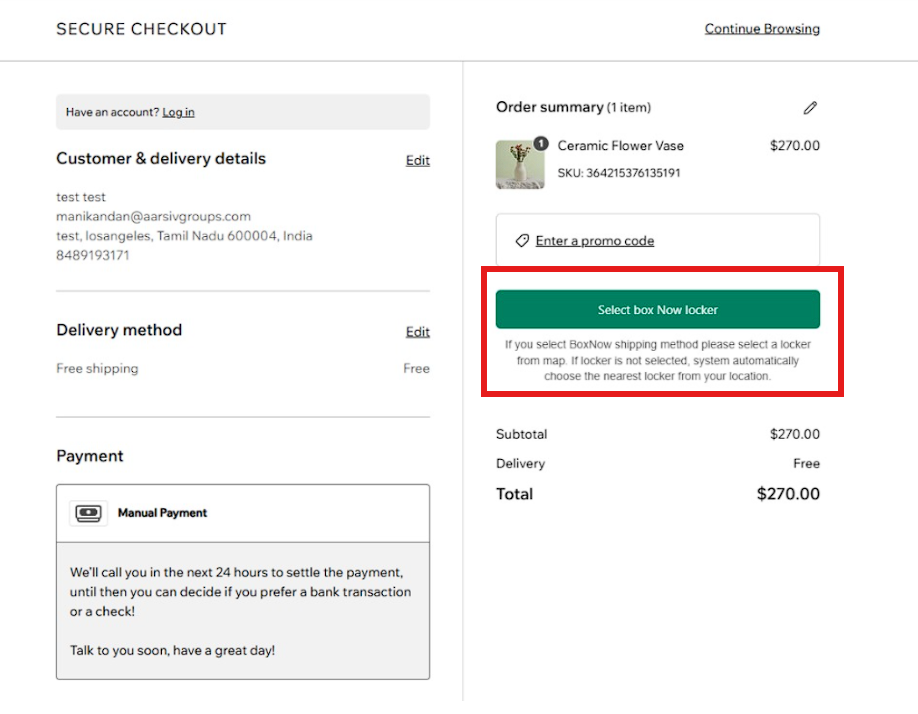
If customer clicks this button:
- Locker map opens
- Customer can search
- Customer selects locker
2. Locker Map Selection
Customer sees:
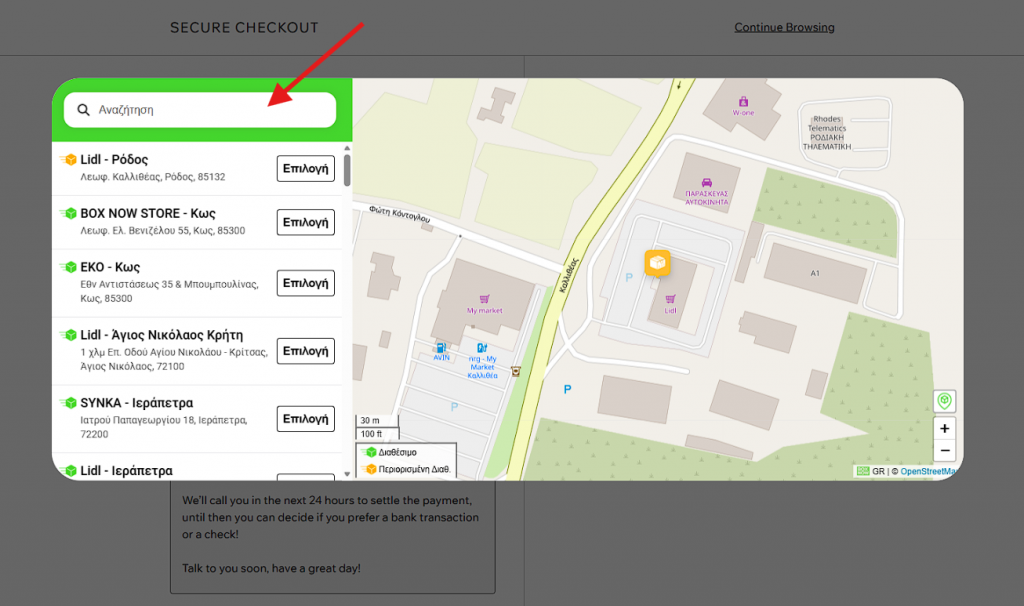
- Search bar
- Nearby lockers
- Interactive map
- “Select” button
Once selected:
The locker details are saved to order.
3. Locker Display on Checkout
After selection, customer will see:
- Locker Name
- Address
- Locker ID
- Change option

If customer does NOT manually select:
System can automatically choose nearest locker (depending on config).
4. Label Generation in Shipi
When merchant generates shipping label:

Shipi will:
- Replace customer delivery address
- Use selected locker address
- Include locker ID in shipment data
This works for:
- Manual label creation
- Automated shipping
If automation is enabled → Shipi automatically ships to selected locker.
No extra configuration needed.
5. Order Details in Shipi
Inside Shipi → Order Details screen:
You will see:
📦 Locker Selected During Checkout
- Locker Name
- Address
- Postal Code
- Locker ID
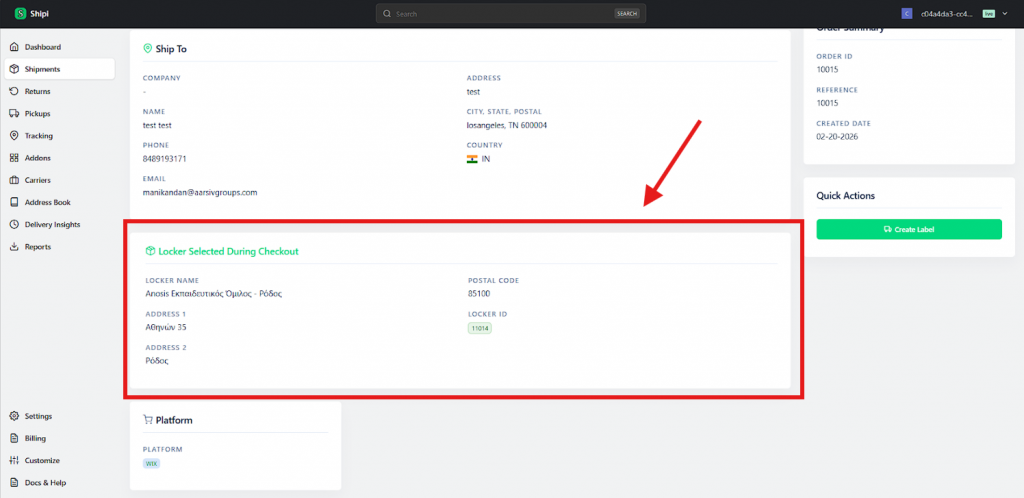
This ensures:
- Transparency
- No confusion
- Easy troubleshooting
🔄 Full Flow Summary
Customer Checkout → Select Locker → Locker Saved → Shipi Uses Locker Address → Label Generated → Parcel Delivered to Locker
Fully automated.
Important Notes
- Make sure BoxNow service is enabled in Shipi.
- Make sure checkout element is published in Wix.
- Test using Test Mode before going Live.
- Works only if BoxNow shipping method is selected.
Testing Checklist
Before going live:
✔ Add BoxNow to checkout
✔ Publish Wix site
✔ Enable “Show BoxNow Locker Map”
✔ Place test order
✔ Select locker
✔ Create label
✔ Confirm locker address appears in Shipi