
This guide explains how to connect, manage, edit, disable, and delete shipping carrier accounts in Shipi.
Connecting your shipping accounts is the first and most important step to start calculating live rates and generating shipping labels.
Step 1: Login to Shipi or Shipi Integration app
- Go to the Shipi dashboard.
- Login using your registered email and password.
- Once logged in, you will land on the Shipi dashboard.
Step 2: Go to Shipping Accounts
- From the left sidebar, navigate to Carriers / Shipping Accounts.
- You will see the Shipping Accounts page.
- If no carrier is connected yet, you’ll see a message asking you to add your shipping accounts.

Click Connect Account or Add Shipping Account to continue.
Step 3: Select a Carrier
- A popup modal “Add New Shipping Account” will open.
- You can:
- Search for a carrier using the search box, or
- Select a carrier directly from the list.
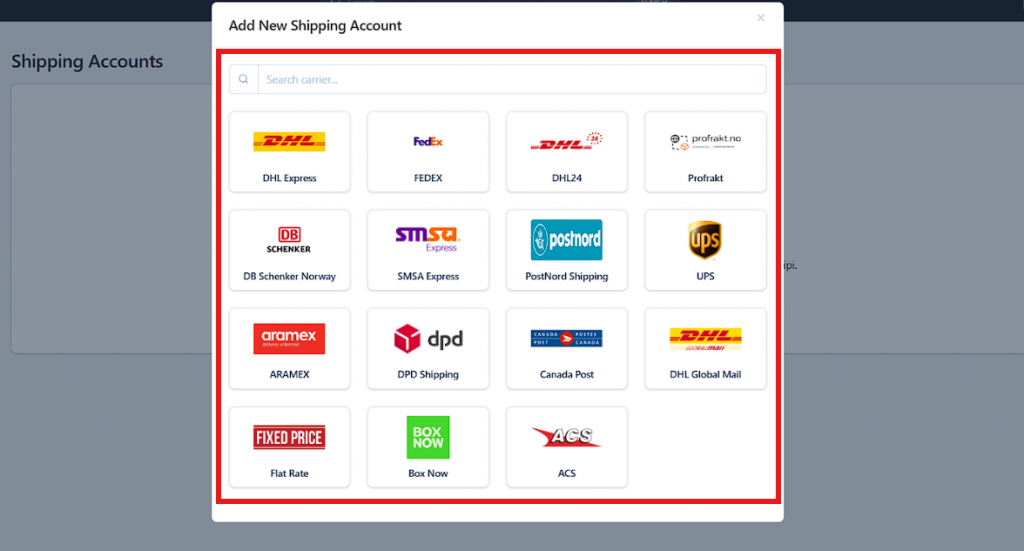
Shipi currently supports multiple carriers such as:
- DHL Express
- FedEx
- UPS
- DHL24
- Aramex
- DPD
- PostNord
- SMSA
- Canada Post
- DB Schenker
- Box Now
- ACS
- Flat Rate
- And more
Click on the carrier you want to configure.
Step 4: Configure Carrier Credentials
Each carrier requires different credentials (API keys, account numbers, usernames, passwords, etc.).
After selecting a carrier:
- You will be redirected to the carrier configuration page.
- Enter the required credentials provided by your carrier.
- Save the configuration.
📌 Note:
Each carrier has its own setup guide and required fields.
Refer to the individual carrier documentation links provided inside Shipi for exact details.
| Carrier | Setup Guide |
| DHL Express | Link |
| FedEx | Link |
| UPS | Link |
| DHL24 | Link |
| Aramex | Coming soon |
| DPD | Coming soon |
| PostNord | Coming soon |
| SMSA | Coming soon |
| Canada Post | Coming soon |
| DB Schenker | Coming soon |
| Box Now | Coming soon |
| ACS | Coming soon |
| Flat Rate | Coming soon |
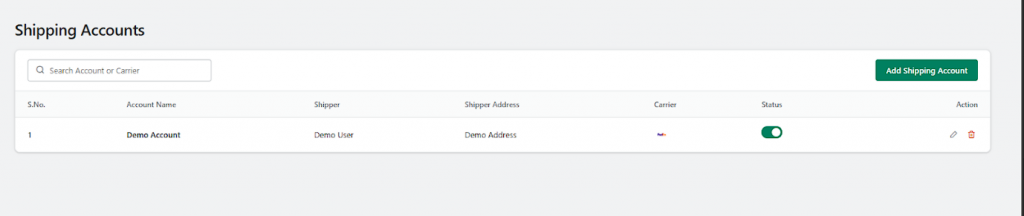
Step 5: View Configured Shipping Accounts
Once a carrier is successfully configured:
- It will appear in the Shipping Accounts table.
- You can see:
- Account Name
- Shipper
- Shipper Address
- Carrier
- Status (Enabled / Disabled)
Step 6: Enable, Disable, or Edit a Carrier
From the Shipping Accounts table, you can manage your carriers at any time.
Disable / Enable Carrier
- Use the status toggle switch to enable or disable a carrier.
- Disabled carriers will not be used for rate calculation or label generation.
Edit Carrier
- Click the Edit (✏️) icon to update credentials or account details.
This is useful if:
- Your carrier credentials change
- You want to update shipper information
- You want to reconfigure services
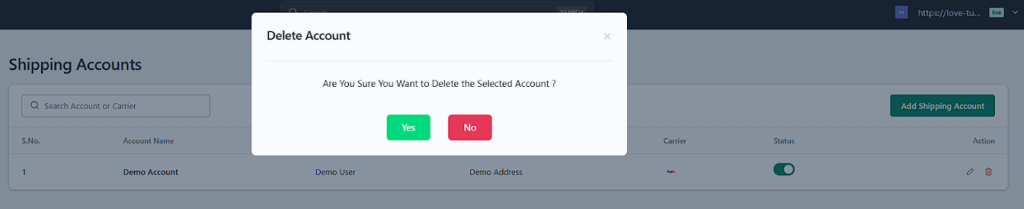
Step 7: Delete a Shipping Account
If you no longer want to use a carrier:
- Click the Delete (🗑️) icon next to the carrier.
- A confirmation dialog will appear.
- Click Yes to confirm deletion or No to cancel.
⚠️ Warning:
Deleting a carrier will remove it permanently from your Shipi account.
Any automation or workflows using this carrier will stop working.
Summary
With Shipi, you can:
- Connect multiple shipping carriers
- Manage all carrier accounts in one place
- Enable or disable carriers anytime
- Edit carrier credentials easily
- Safely delete carriers with confirmation
Once your shipping accounts are configured, you can start:
- Calculating live shipping rates
- Generating shipping labels
- Automating your shipping workflow